Design Realistic Box Shadows In Photoshop
In this tutorial we’ll utilize a simple yet powerful technique for adding realistic box shadows to design elements. In this tutorial we’ll add the shadow to a photograph to illustrate the different mediums you can apply this to. Similar techniques can be used to created corner shadows or curl shadows.
Tutorial Assets:
Car Photo: http://www.sxc.hu/photo/1289287/
Paper BG: http://www.psdgraphics.com/file/old-paper.jpg
Check this post I wrote on creating box shadows with pure CSS!
This is what we’ll be creating.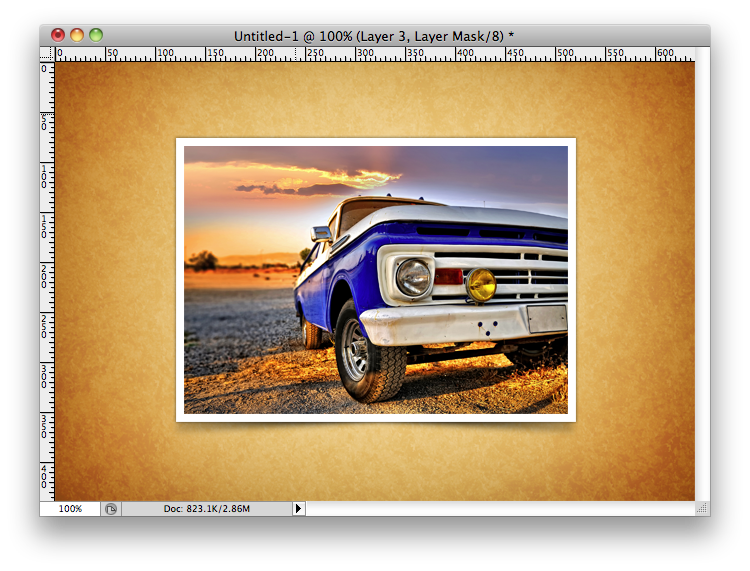
Step 1:
Create a new Photoshop File with the dimensions of:
- Width: 640px
- Height: 440px
Step 2:
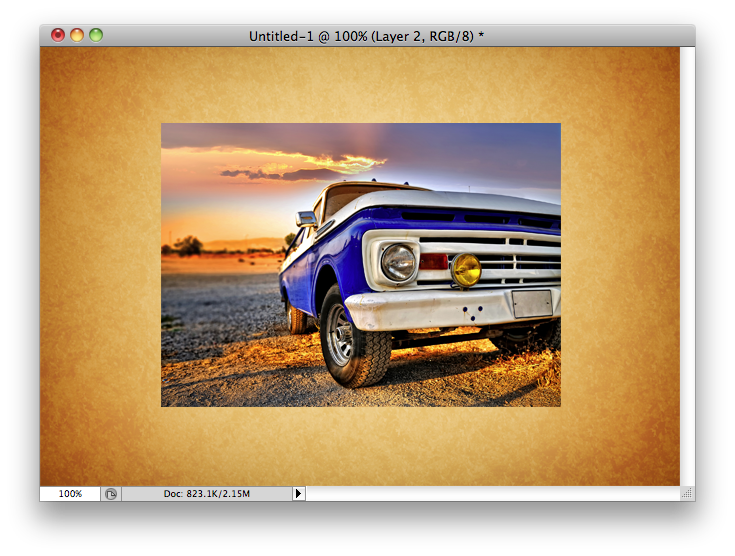
- Select file->Place and import the car and paper bg graphic files.
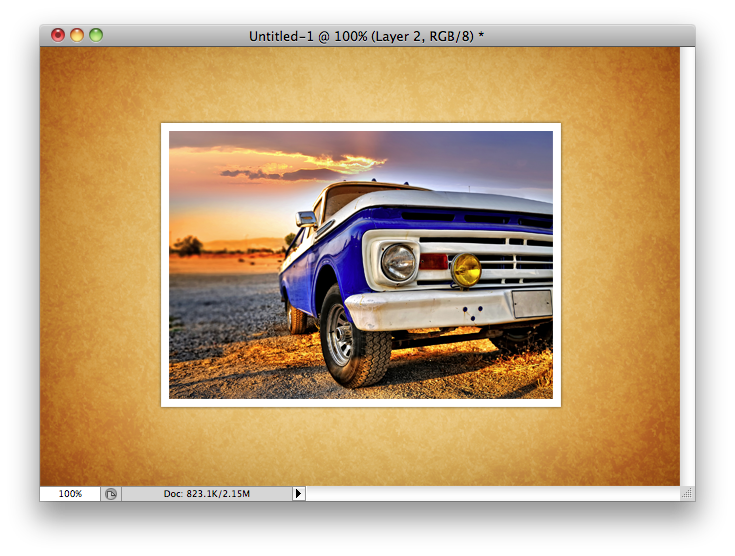
- Size them down so the paper BG covers your entire canvas, and the car is in the middle
- After sizing down, I’ve rasterized my layers by right-clicking on the layer name and choose “Rasterize Layer”.
You should have something like this:
Step 3:
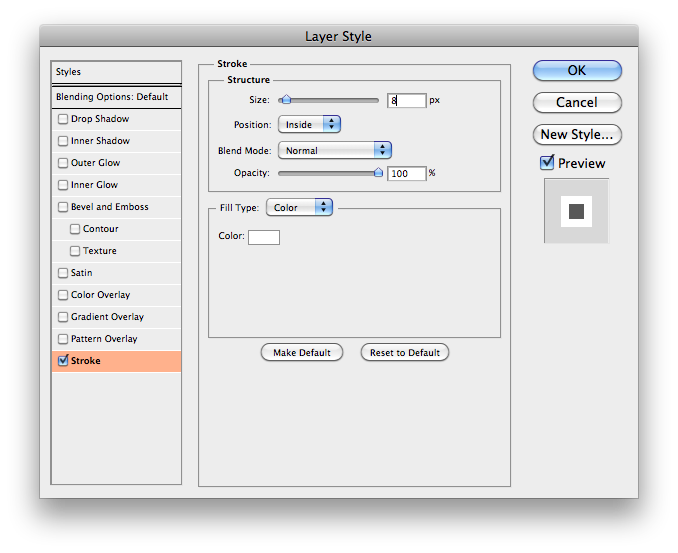
We are going to create a white stroke around our car picture to give it a little more separation and contrast from the paper background.
- Select your Car Layer and apply a Stroke layer style (Layer menu -> Layer Style -> Stroke)
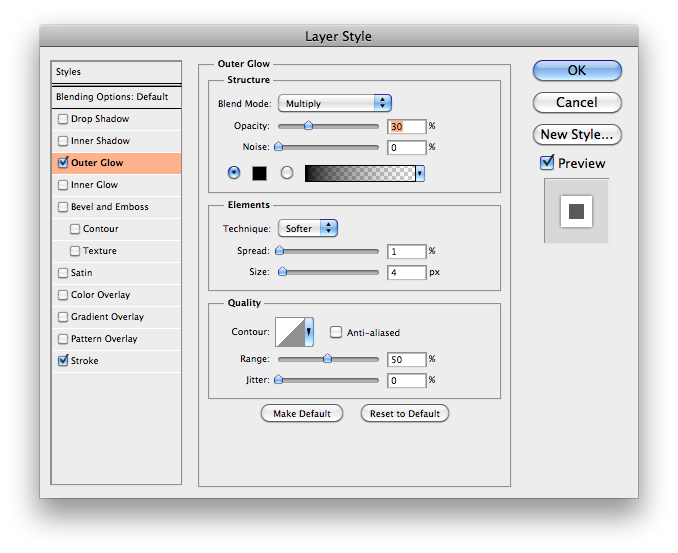
- Select the Car Layer and apply a Outer Glow layer style (Layer menu -> Layer Style -> Outer Glow)
Here are the settings I used:
Your design should be looking something like this now:
Step 4:
Now comes the fun part of actually adding the realistic box shadow to our design. There are plenty of methods for adding box shadows to elements, but in this example we’re going to use the pen tool to create our vector shadow shape.
Here goes:
- Insert a guide line (View->Show Rulers) then click on the top ruler bar and drag a guide down) and place the guide a bit below the bottom of your image.
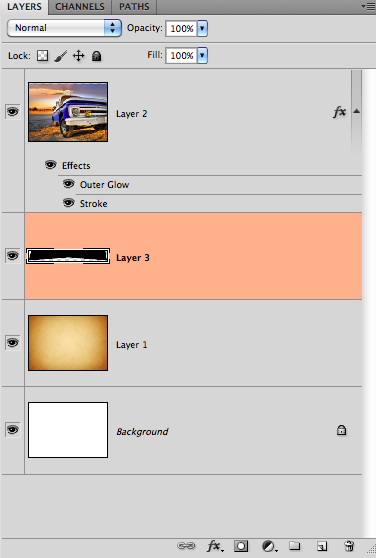
- Create a new layer beneath your car layer and complete step 3 on that layer.
- Grab the pen tool and draw a “bow-tie” shape around the bottom of the car photo.

- Once you’ve got that shape in place, we are going to fill it with black.
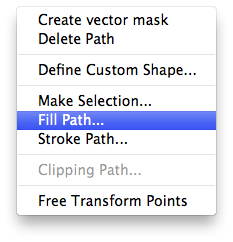
- With the pen tool still active (or any vector tool) right click anywhere inside of the ‘bow-tie’ shape and select (“Fill Path”).
- Choose black for the color.
This is what our layers panel should look like at this point in time:
Next, we are going to finish the effect, by applying some blurs, and gradients on layers masks.
Step 5: (Last Step)
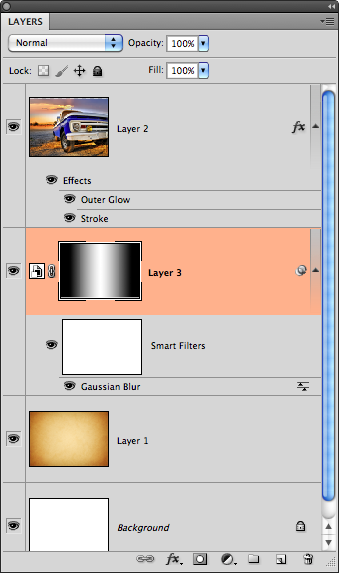
- Right click your bow-tie shape layer and select (Convert To Smart Object). This allows us to create “Smart Filters”, which are essentially non-destructive filters.
- Select your bow-tie layer and apply a Gaussian Blur filter (Filter menu -> Blur -> Gaussian Blur)
- Here are my settings for the blur, feel free to adjust to your needs/liking.
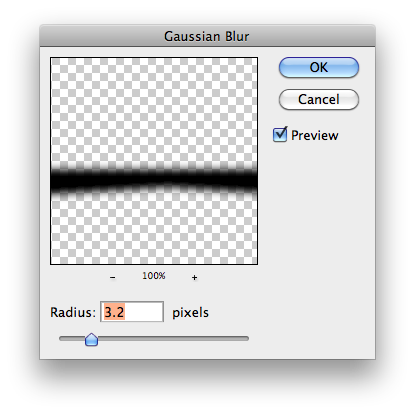
- Next, we apply a Layer Mask to our “bow-tie” layer (Layer Menu -> Layer Mask -> Reveal All)
- Select the gradient tool (Shortcut key G) and make sure you have the “reflected” gradient selected like so:

- Make sure you gradient preset (click on the little gradient bar in the toolbar options panel at the top) goes from White to Black like so:
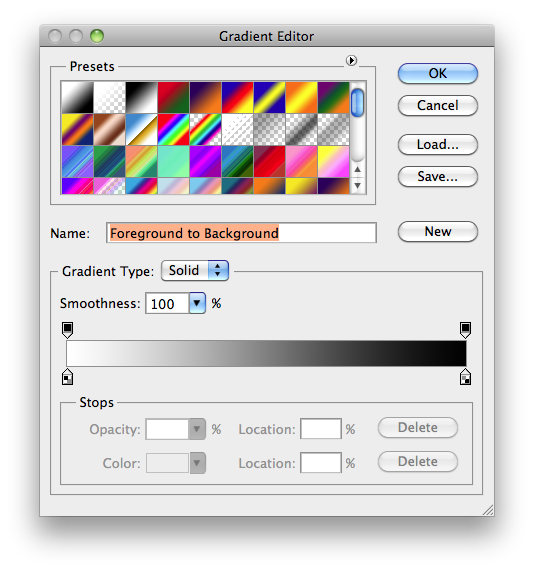
- WITH THE BOW-TIE LAYER MASK ICON SELECTED, drag a gradient staring in the very center of the bow-tie towards the outer edge. This will mask out the edges of the bow-tie, which gives the final effect of “falloff” which makes the shadows realistic.
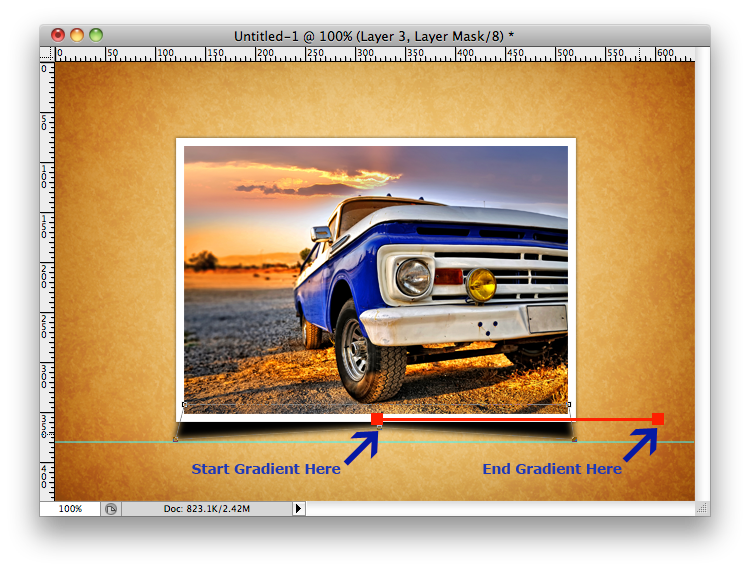
Done! Here is how our layers panel should look in the end, and one more look at our final box shadow.
Final Image:
Smooth sexy realistic box shadows! I’ve moved my bow-tie shadow layer up 10 or so pixels to “flatten” out the effect. Move it up, there is less ‘lift’ off of the page. Move it down, the image has greater lift/curl off the page.
Do you have some sweet technique for shadowing boxes? Sound off in the comments! Share your knowledge.
Jul 06, 2012 @ 13:41:41
Dude, great work thanks
Nov 30, 2012 @ 20:34:57
Hi Bro, nice work and awesome, i understand easily this way….keep it up….and hope we get some other new stuff, thank you
Mar 05, 2013 @ 09:18:53
Thanks a lot for this! I was wondering how to do it, I’ve seen people selling these for ~6 per use. Rather than buying a license each time, I’d rather make them on my own. 🙂
Aug 22, 2013 @ 00:41:04
thank you very much!!! its very help me 🙂
Nov 05, 2013 @ 12:53:30
Very Good Tutorial