Create a Custom Animated Pre-loader in Photoshop
Introduction
This tutorial will cover creating a custom designed pre-loader in Adobe Photoshop. We’ll be creating the loader from scratch, covering the animation process and finally converting it to an animated .gif!
Here is what the finished product will look like:
It’s fairly in-depth, here we go!
Phase 1 – Design the Pre-Loader
Step 1 – Set up your Document and create your background
- Set up your PS canvas with the following dimensions: (500 px by 500 px, 72 DPI)
- Create a new layer to serve as your background and fill it with the hex color: #2d2d2d
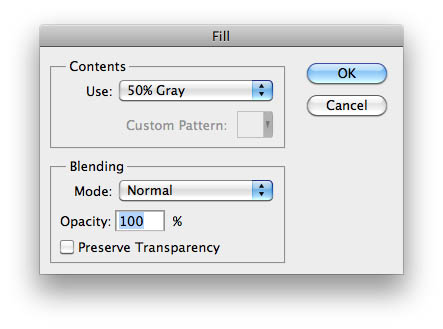
- Create a new layer and fill it with 50% gray (Edit menu -> Fill -> 50% gray)
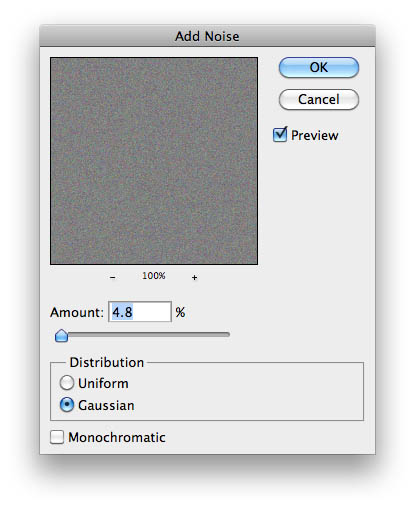
- Apply the “Add Noise” filter (Filter menu -> Noise -> Add Noise) to that 50% gray layer with the following settings:
- Apple the “Wind” filter (Filter menu -> Stylize -> Wind) to that layer with the following settings:

- Add a Black & White adjustment layer (Layer -> New Adjustment Layer -> Black & White) to the same layer with noise and wind. Use the following settings:
- Create a clipping mask to ensure the adjustment layer only effects the layer below it: (Right Click On Adjustment Layer -> Create Clipping Mask)

Ok, now we have a bit of texture on the background layer, and we’ll add a subtle pattern to it for good measure. These steps will illustrate the process of creating repeating patterns.
Step 2 – Add Some Texture to You Background
- Create a new Photoshop Document that is 5 px by 5px
- Zoom in all the way using the zoom tool (Z is the shortcut for the zoom tool)
- Create a new transparent layer, then delete the background layer
- With a 1px sized Pencil tool place black dots in the upper left and middle of your canvas like this:
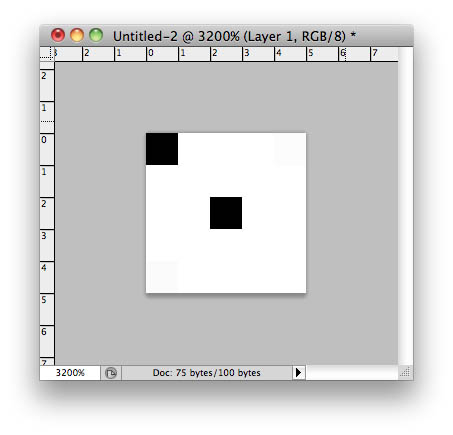
- Define the pattern: (Edit menu -> Define Pattern)
- Switch back to your pre-loader document and create a new blank layer above the adjustment layer and wind/noise layer
- Fill this layer with your newly created pattern: (Edit -> Fill). Your pattern should be the last thumbnail in the patterns list.
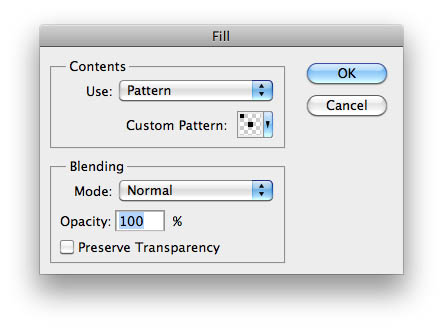
- Take that dotted pattern layer’s opacity down to 20-30%
That’s it for the background, now let’s move on to creating the shape which we will use for our pre-loader. This part can be a bit tricky because we will be using vector shape tools with various shape modes and combining multiple shape layers to create our final look.
Step 3 – Creating our Pre-loader Shape
- Take the circular shape tool and create a circle on a new layer (the fill color can be whatever you like, I used red). (Hold down shift to get a perfect circle):
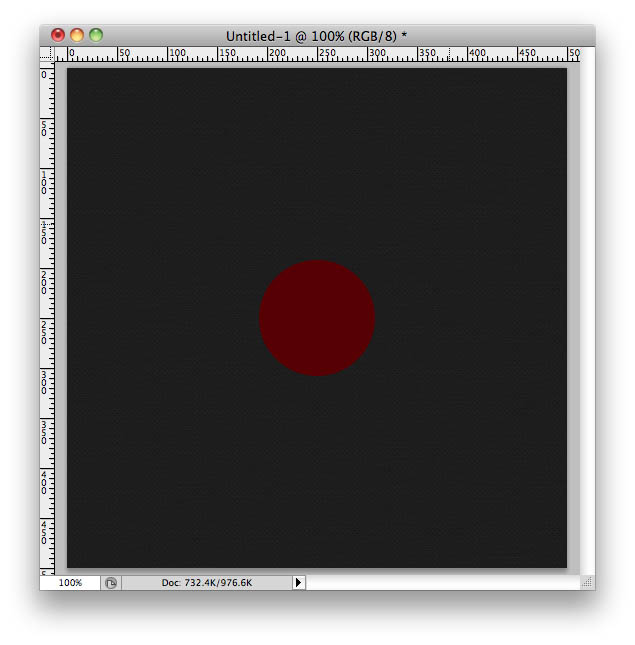
- Duplicate that layer, change the fill color (I used white) and scale it down a bit, making sure you’re scaling from the center (Control/Command+ T for free transform):
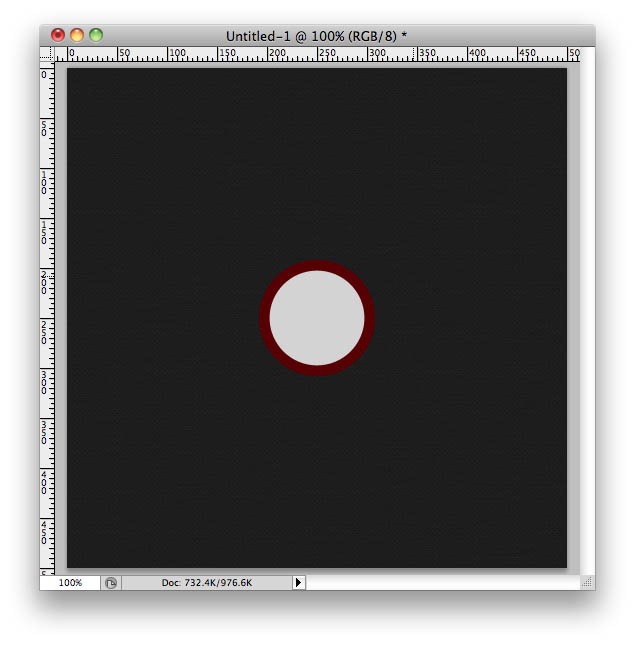
- Make sure that everything is perfectly centered on your canvas by selecting the two circle shape layers and the background layer. Then switch to the move tool and select the horizontal and vertical centering ticks:

- Make sure that you created ‘Shape Layers’ and not paths or fill pixels when you created your circles. Your layers should look like this, each having a vector mask:


- Select the white circle layer and choose “Edit Menu -> Copy”: (Control/Command + C)
- Select the red circle layer, make sure you have the shape tool active, and choose “Edit Menu -> Paste” (Control/Command + V)
- Choose the “Subtraction” mode tick mark in the tool options bar to subtract the white circle’s shape from the red circle’s shape

- You should now just have an outer ring of red like so:
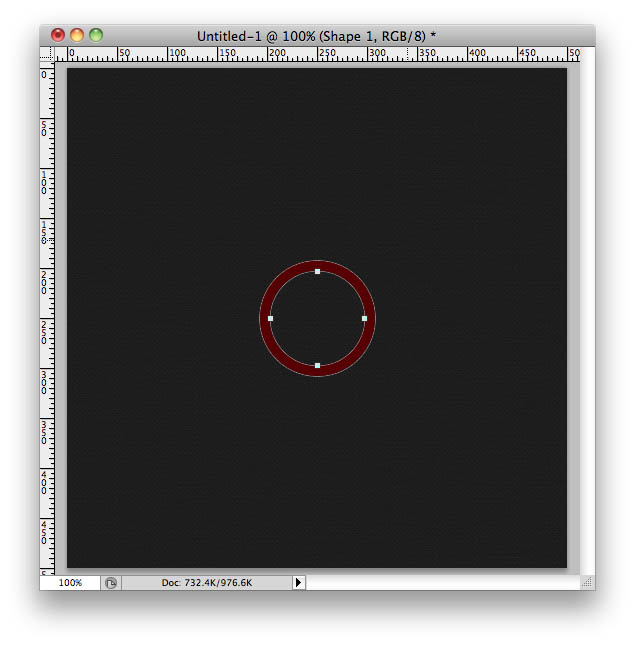
We’ve got the base circle in place now, and we’ll utilize a similar technique to cut out each of the “tick” marks in your pre-loader. Once we’ve done that, we’ll have the shape complete and will be ready to style it.
Step 4 – Cut Out The Tick Marks From Our Shape
- Get the line tool (underneath the other shape tools) and set the size or “weight” to 5px
- Draw a vertical line straight down through the middle (holding shift to ensure exact vertical angles)
- Click on the shape layer and the background layer and make sure they are perfectly centered as we did before (Switch to the move tool and select the horizontal and vertical centering ticks):

- You should have something that looks like this now:
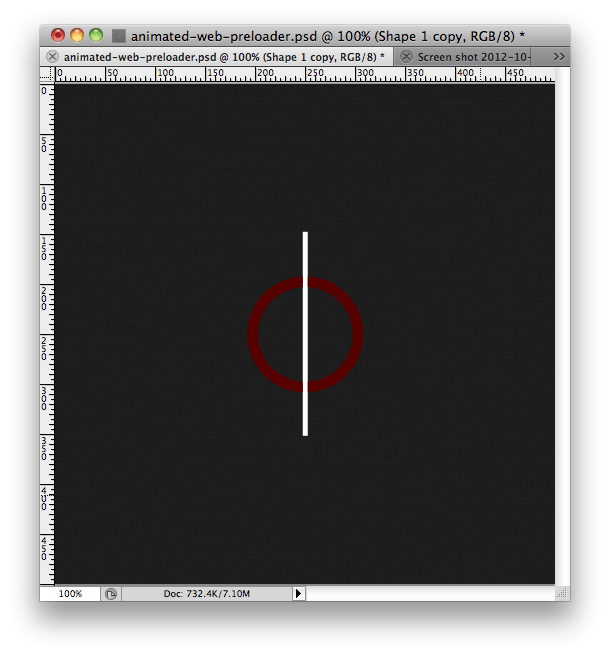
- Select the shape layer and free transform it (Control/Command + T) rotating it by 45 degrees. Don’t manually rotate it, make sure to actually punch in “45” in the degree rotation option in the toolbar

- Next select (Edit Menu -> Transform -> Again). We are going to do this command several times while holding down option/alt to rotate our line, while making copies of it and adding to our shape layer at the same time! The easiest way to do this is using this keyboard command (Control/Command + Option/Alt + Shift + T)
- Apply that command a few times until the tick mark has rotated all the way around like so:
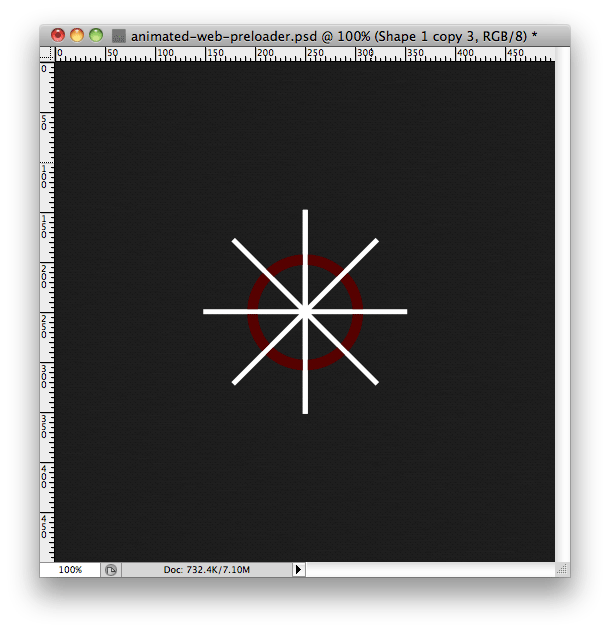
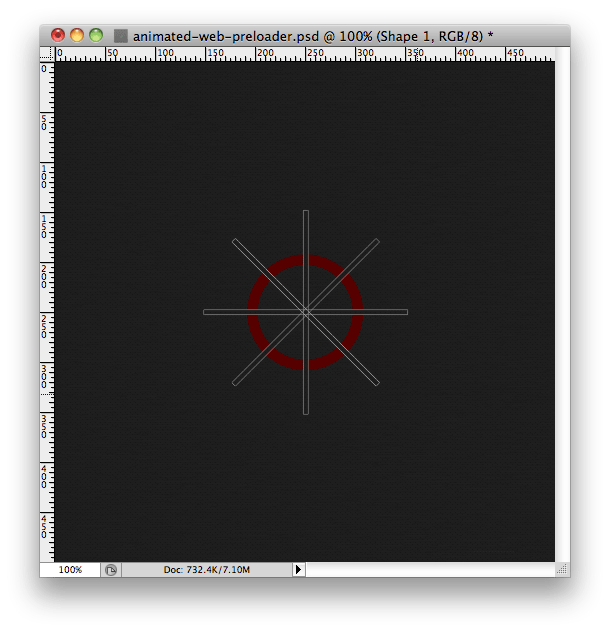
- Utilizing the same method as with your red and white circles, copy the newly created tick mark shape and paste it onto your red circle shape and change the mode to subtraction.

- Our circle shape layer should look like this now:
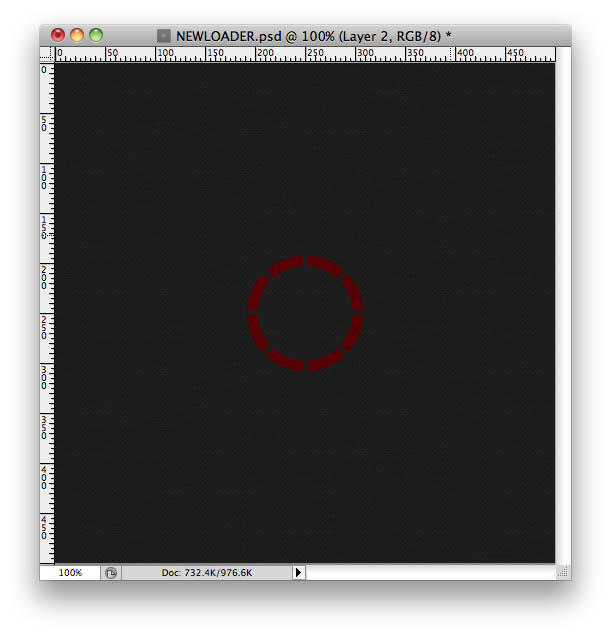
Phase 2: Style our Shape
Now that your shape is completed, it’s time to stylize! Let’s get going. We will be adding several layer styles to give the appearance that the tick mark is inset into the background.
Step 5 – Add Layer Styles To Create Inset Shape
- Set Drop Shadow color to white:
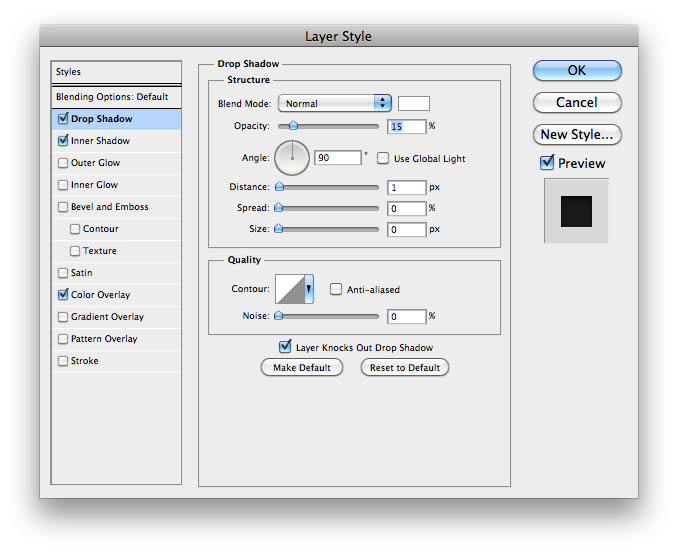
- Make Inner Shadow color black:
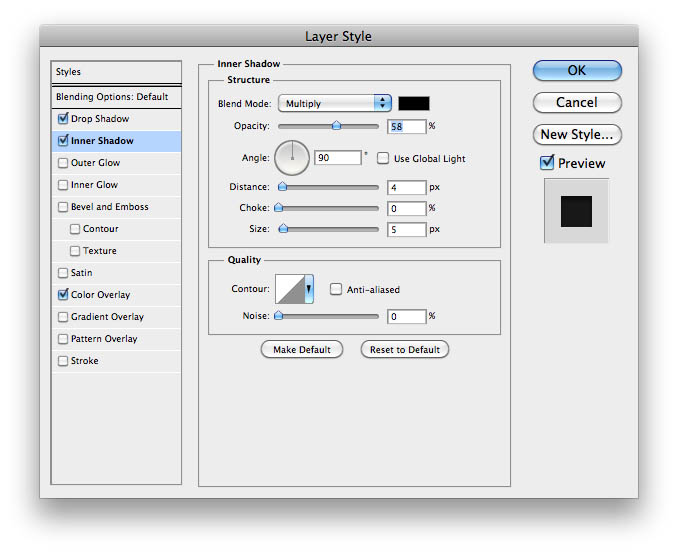
- Set Color Overlay:

- Set the color of the Color Overlay as follows:
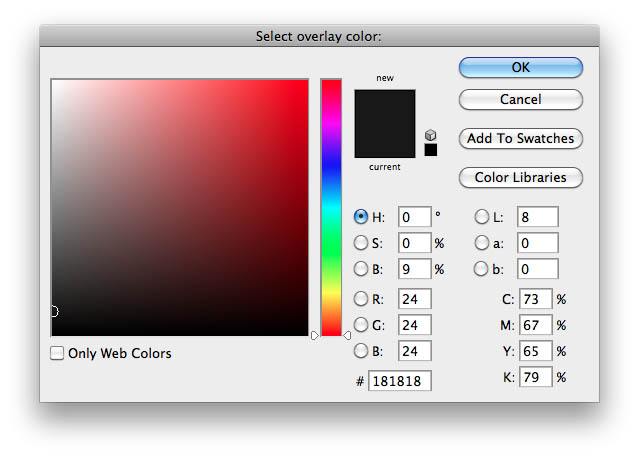
- Add a new pixel layer mask on your shape layer (Layer -> Layer Mask -> Reveal All)
- Paint with black over half of the circle, effectively hiding it from view. This is an enlarged representation of what your layer mask icon should look like:
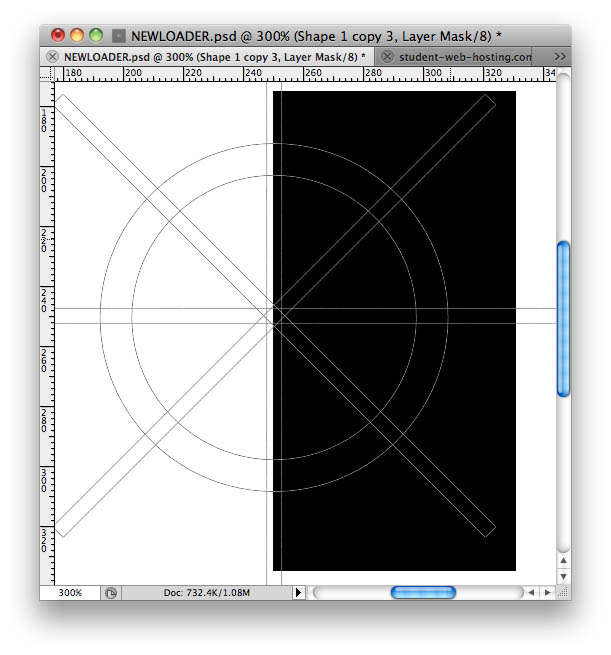
- You should end up with the following result:
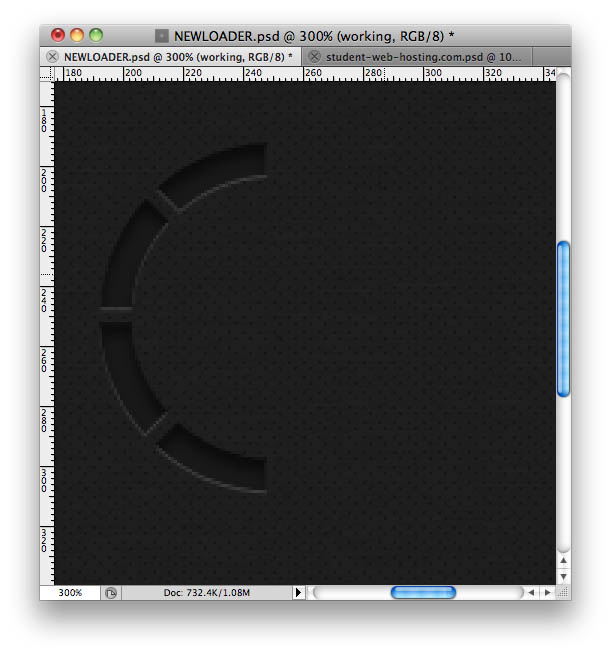
Step 6 – Create the Most ‘Faded’ Tick Mark
We’re going to duplicate the layer, and then mask out the ticks that we don’t want. After we’ve masked out the ticks, we’ll modify the layer styles to give the appearance of glowing light inside of the tick mark. We’ll stylize each of the ticks a bit differently so as to hint that the glow is fading in each successive tick mark.
- Duplicate the shape layer
- Rename that shape layer to “Shine1”
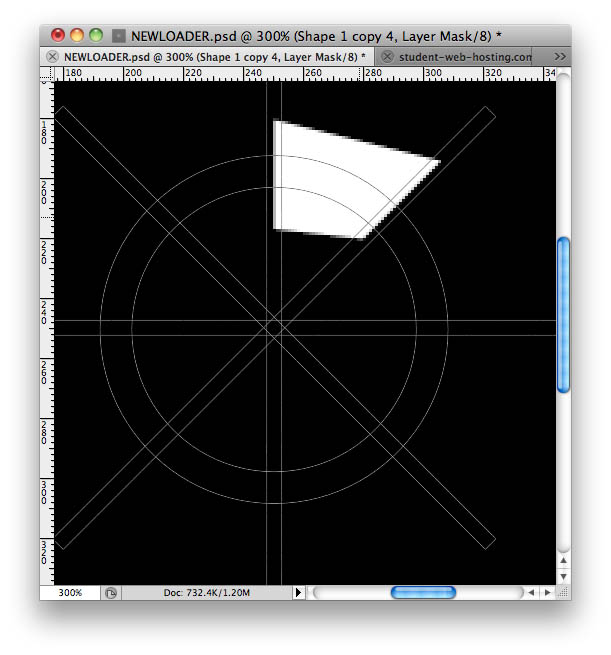
- Create a layer mask on the Shine1 layer and mask out all but the top right tick mark like so:
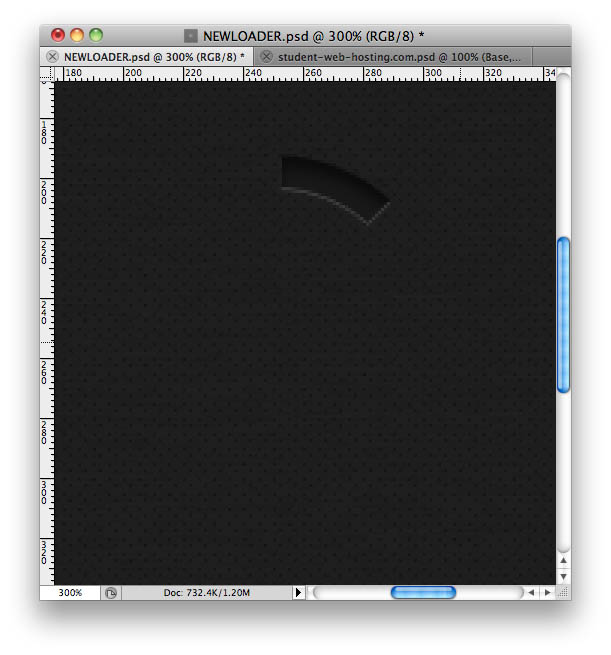
- You should end up with this result:
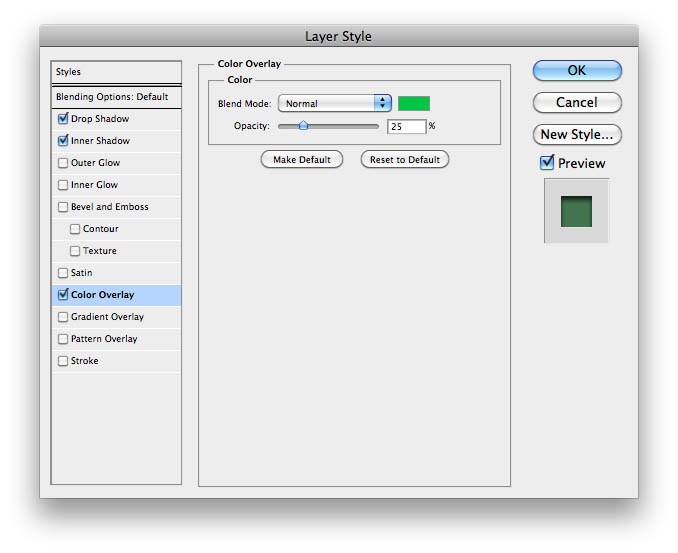
- Apply the following layer styles to the “Shine1” Layer:
- Inner Shadow:

- Color Overlay:
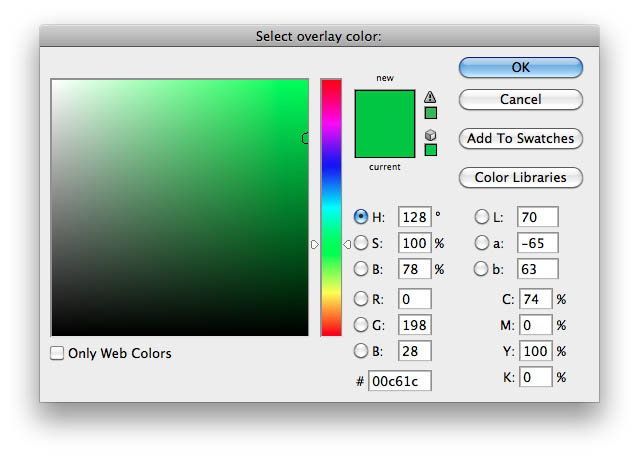
- I used the following color for the color overlay, but use whatever color you want:
Step 7 – Create the Second Most ‘Faded’ Tick Mark
- Duplicate the ‘Shine1’ layer, and name it “Shine2”
- Edit the mask so it masks out all but the next tick mark down
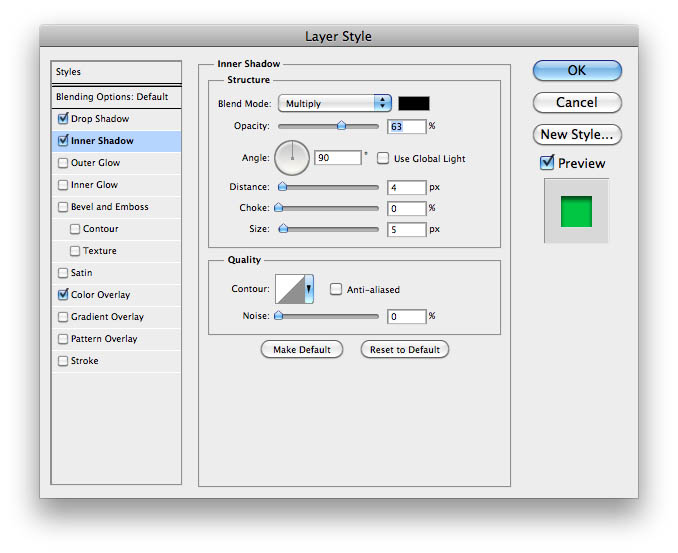
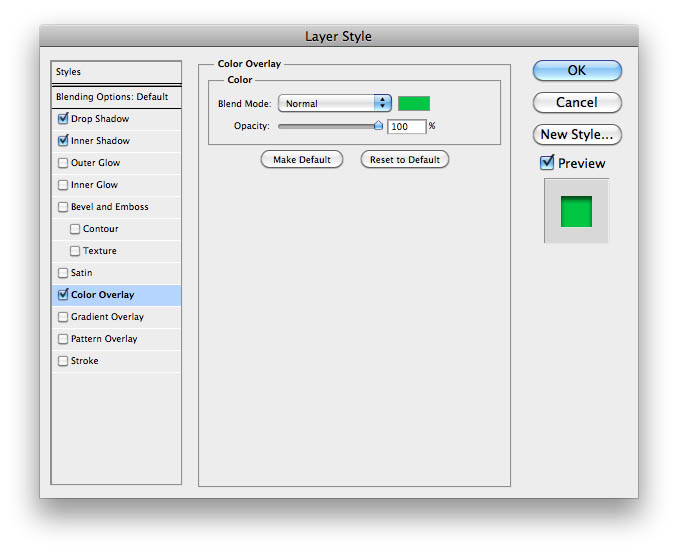
- Apply the following layer styles to the “Shine2” Layer:
- Inner Shadow:
- Color Overlay:
Step 8 – Create the Third Most ‘Faded’ Tick Mark
- Duplicate the ‘Shine2’ layer, and name it “Shine3”
- Edit the mask so it masks out all but the next tick mark down
- Apply the following layer styles to the “Shine3” Layer:
- Inner Shadow: REMOVE
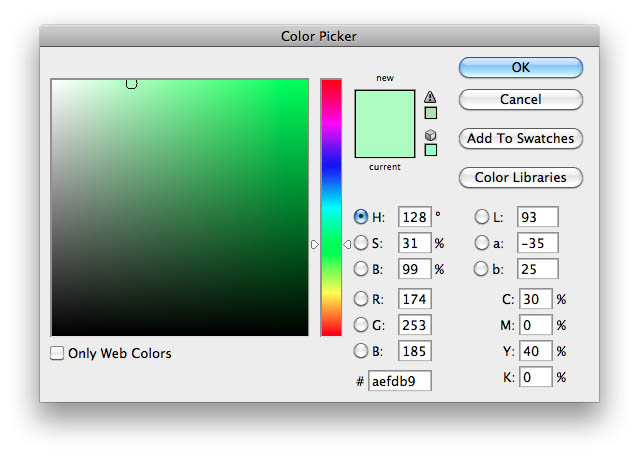
- Inner Glow:

- I used the following color for the inner glow, but use a light version of whatever you’ve picked for your color overlay.
Step 9 – Create the Fourth Most ‘Faded’ Tick Mark
- Duplicate the ‘Shine3’ layer, and name it “Shine4”
- Edit the mask so it masks out all but the next tick mark down
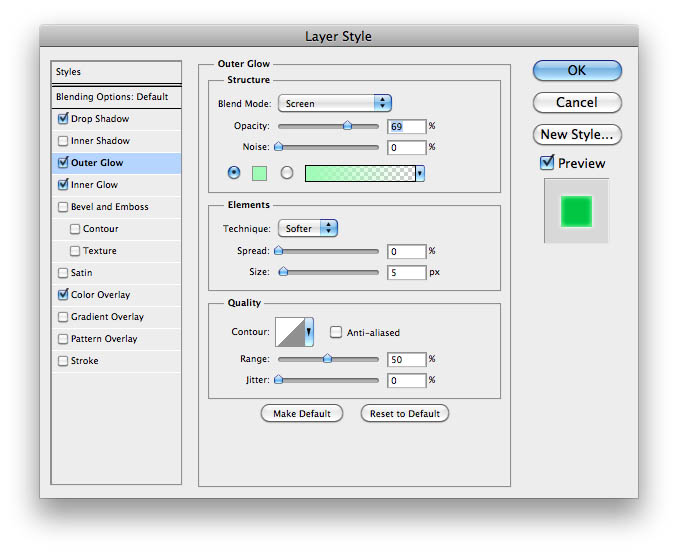
- Apply the following layer styles to the “Shine4” Layer:
- Outer Glow:
- Inner Glow:
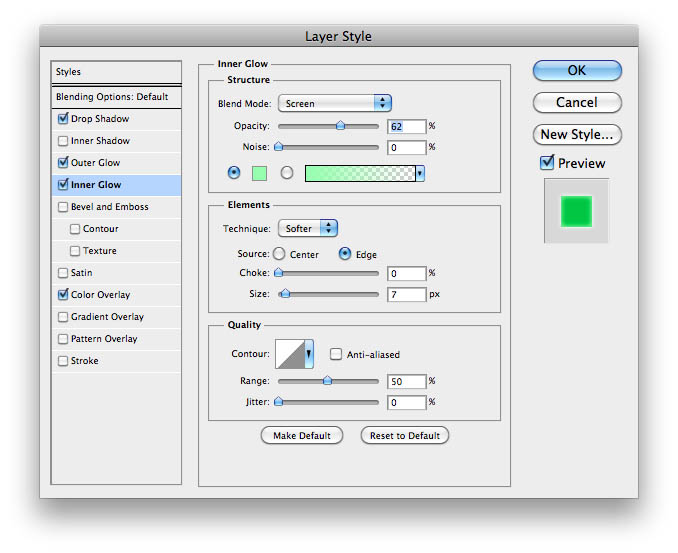
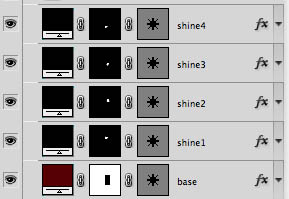
- Your layer stack should now look like this:
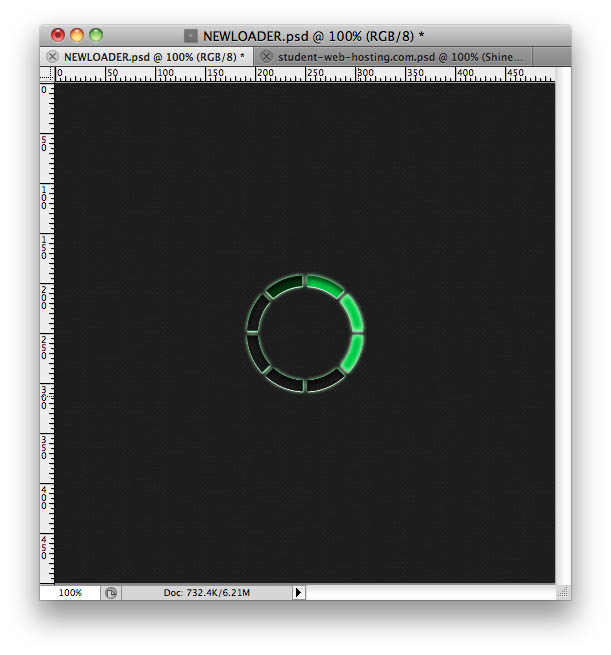
- Your finalized image pre-loader should now look like this:
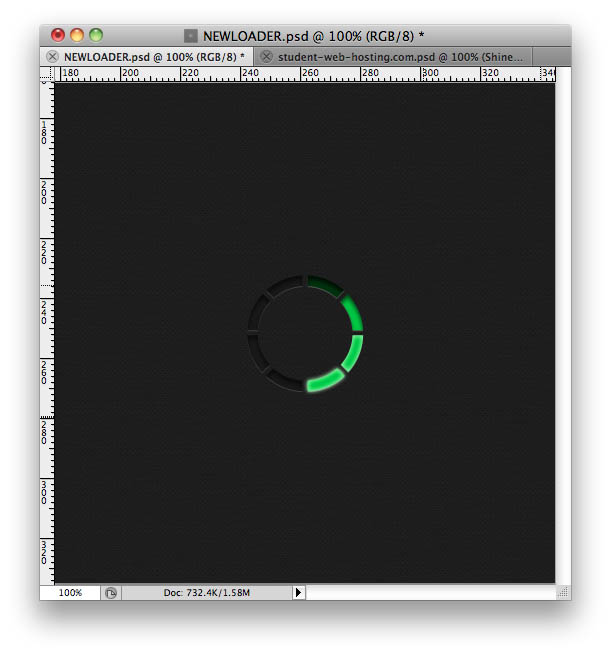
Phase 3 – Animate The Pre-Loader
The final phase of this project is going to be animating the pre-loader. We’ll group all of the layers that make up the pre-loader and then duplicate the group several times, rotating it 45 degrees each time we duplicate. Once we’ve got the layers all set up, we’ll animate the loader.
Step 10 – Group and Duplicate
- Group all of the layers that make up your finished loader into a folder: (Select all layers + Control/Command + G)
- Rename that group “Tick1”: (Double click the layer name to rename it)
- Duplicate that entire group and rotate the new group 45 degrees
- Repeat step 3 several times until you’ve duplicated and rotated your loader until it has gone all of the way around, you should have 8 total groups.
- Your layers panel should look like this:
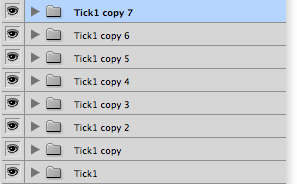
- Your canvas should look something like this
Step 11 – Animate
We’re going to animate this loader using the standard frame-by-frame animation method. We could easily do this with the timeline-based animation as well, but for this particular animation exercise frame-by-frame method will do just fine.
- Open up your animation panel: (Window -> Animation)
- Make sure you are in frame-by-frame mode, not timeline mode
- Turn off visibility on all of your grouped tick layers except the first layer
- Push the “Duplicate Selected Frames” button next to the little trash can icon
- Turn off visibility of the first layer, and turn on visibility of the second tick layer

- Repeat steps 4 & 5 until you have a keyframe set for each of your tick marks (8 total)
- Your animation panel should look something like this:

- Select all of the frames by clicking on the first frame then shift + click on the last frame
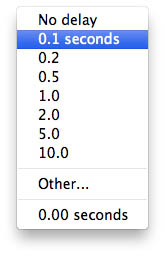
- Change the delay to .1 seconds
- Push the play button and watch your animation!
- Save your document
- Save a .gif version of your animation (File Menu -> Save For Web)
- Click the .gif preset from the top right drop down
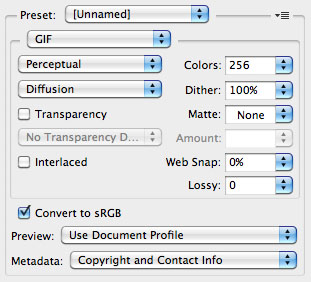
- Click save and name your .gif
- You can open your .gif up in a web browser to see how it will look
Conclusion
That’s it! You now have a custom pre-loader for your website. Giving your site a custom designed pre-loader is just one more way you can separate yourself from the pack and truly make your sites unique. Quite a few variations are possible with this exact same technique, so be creative and experiment. Try different sizes. Try creating a matted transparent pre-loader that would then be able able to animate on top of various backgrounds. Hope you enjoyed this tutorial!


Aug 17, 2013 @ 08:12:26
Create a Custom Animated Pre-loader in Photoshop – StudentWebHosting.com
Mar 26, 2016 @ 12:32:14
A great thanks my friend, great post. I enjoyed it ;D
My result here: http://hpics.li/cdf7fd8